
To submit your paper to a journal you will likely need to drastically reduce the size of your manuscript pdf – especially for the initial submission – but how do you do this without hurting the quality of your images?
A Quick Fix
For an initial submission, let’s try the easiest way first.
Open the file you wish to reduce in Adobe Acrobat Pro (this will not work with Adobe Reader). Under File -> Save as Other -> Reduced Size PDF. Choose Retain Existing and pick a new file name. The new file will be the smallest Acrobat can shrink it without visually altering your digital image quality, however the file is possibly no longer at print resolution and you should always screen the file to make sure no odd image alterations took place.
Did that not reduce it enough? Or do you need it at print resolution for the final submission? Read on, traveler.
More Control with Adobe Acrobat
There are two ways to have more control over your pdf size. One is found in Adobe Acrobat and one in Adobe Illustrator. Let’s look at Adobe Acrobat first.
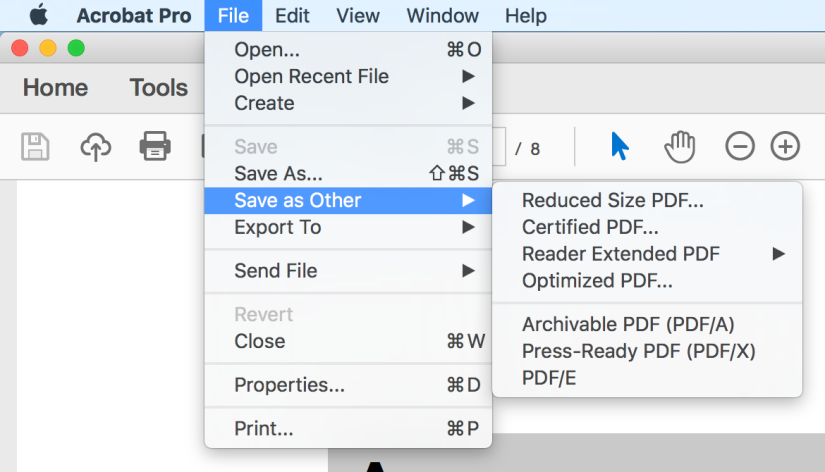
Under File -> Save as Other -> Optimized PDF.
This opens up the PDF Optimizer window.
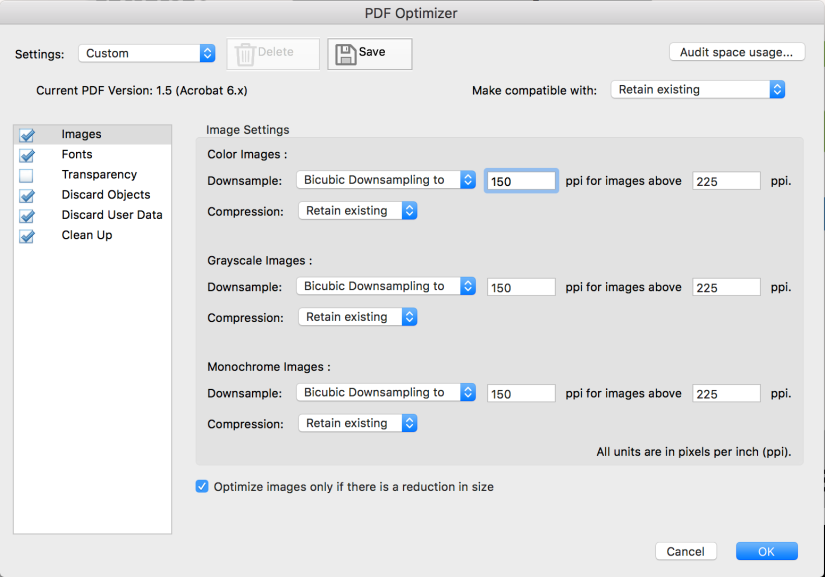
Let’s click the “Audit Space Usage” button in the top right. This shows you where the majority of your file size is coming from. Predictably it will be from your images.
Under the Image Settings you see a lot of options for how to alter your Color, Grayscale, and Monochrome Images. The safest type of downsampling is called “bicubic downsampling” and it is probably preselected for you.
For print resolution, you want to not downsample below 300 ppi for any of these options. And you want to retain your existing compression. Note that publications will generally tell you the dpi/ppi they require. In some cases they will ask for the monochrome images not to be reduced below 1200. Look at the author guidelines of the journal you are submitting to in order to be sure of their requirements.
For getting that file size down to manageable levels, let’s choose 150 ppi and retain existing compression. This should reduce the file size, but you shouldn’t really notice a difference in image quality.
For getting that file size down as low as possible, let’s choose 72 ppi and retain existing compression. This many begin to erode your image quality depending on your images. Check through and see if it degrades the images too much for your liking.
For more tips on these other windows you can find more info here.
More Control with Adobe Illustrator
Go to File -> Save as -> PDF
Here you’ll first see a screen like so:
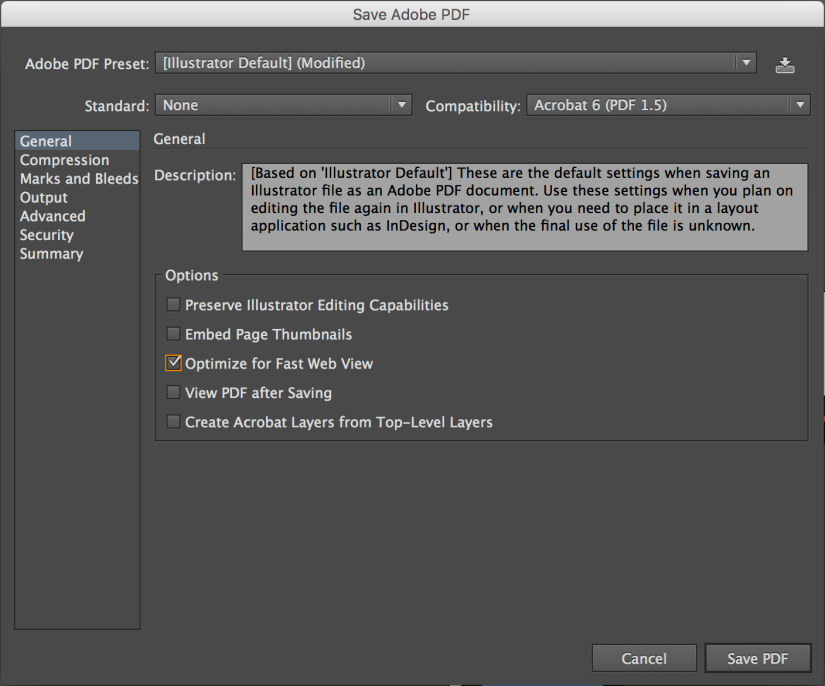
To reduce the size, select the checkbox above for “Optimize for Fast Web View” and uncheck the other boxes.
Next click the “Compression” tab on the left hand side of the window and these options will appear:
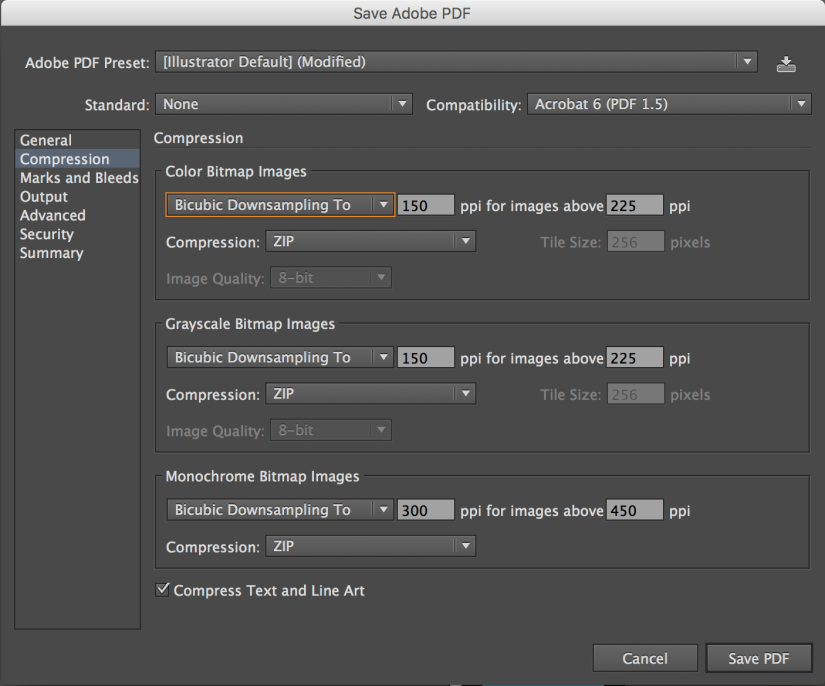
You’ll note these options are very similar to those for Optimizing your PDF in Acrobat. The same rules apply.
For print resolution on that final manuscript submission, you want to not downsample below 300 ppi for any of these options. Be sure to check the journal you are submitting to as they may stipulate these settings. In particular, they might request your monochrome bitmap images not dip below 1200 dpi/ppi.
For getting that file size down to manageable levels for the initial submission, let’s choose 150 ppi. This should reduce the file size, but you shouldn’t really notice a difference in image quality.
Still not small enough? For getting that file size down as low as possible, let’s choose 72 ppi. This many begin to erode your image quality depending on your images. Check through and see if it degrades the images too much for your liking.
Always choose Bicubic downsampling and ZIP compression.
Hopefully this helps! Let me know if you have specific concerns in the comments.

Very clear description of the process. Thanks for taking the time to write this up!
LikeLike