
In science, it’s critical to present our data in the most honest and accurate fashion. This means no stretching, no skewing, no distorting, no compressing… you get it, no compromising your graphs or images in any way. To avoid this, pretty much all image software programs allow you to proportionally alter the size of your figure elements by holding down the “Shift” key as you resize. But how do you tell if you’ve accidentally altered your image or type proportions without intending to?
Type Stretching
In Adobe products it’s simple to find out if you’ve distorted your type. If you go to “Window” -> “Type” -> “Character” it will open a panel. On that panel you want to click to the top right button to show all of the options:
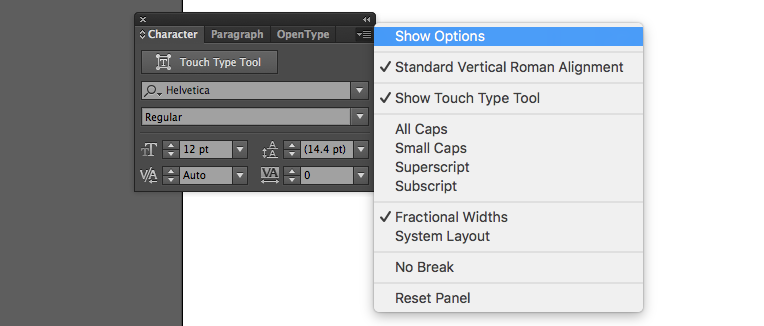
This shows you a bunch of other metrics which I’ll need to make a blog post at some point to explain. But the one we want is the stretched type indicator shown by the red arrow below.

My “type sample” has not been stretched in any way and so 100% is indicated. But, if I stretch the type, you can see the percentage changes:
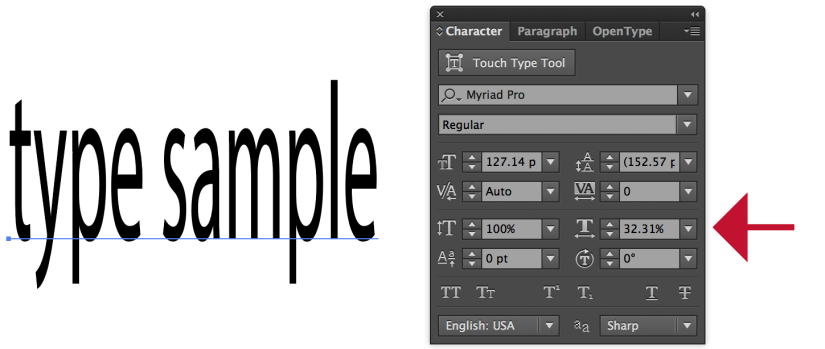
If I want to restore the type back to 100%, all I have to do is click the dropdown arrow next to the percentage and choose 100%.
That’s it – that’s how to fix type stretching in Adobe software. In Powerpoint, I believe they have set it up so you can’t actually stretch the type, but this isn’t true for images.
Image Stretching
In Powerpoint (post 2016), it’s pretty easy to tell if an image has been stretched. If you open an image and have it selected you should see a “Picture Format” option appear on the top right. By clicking it, a panel swings out. The sizing icon gives you the options below and note in this image that the height and width have both been scaled to 27% indicating a correctly proportional image.
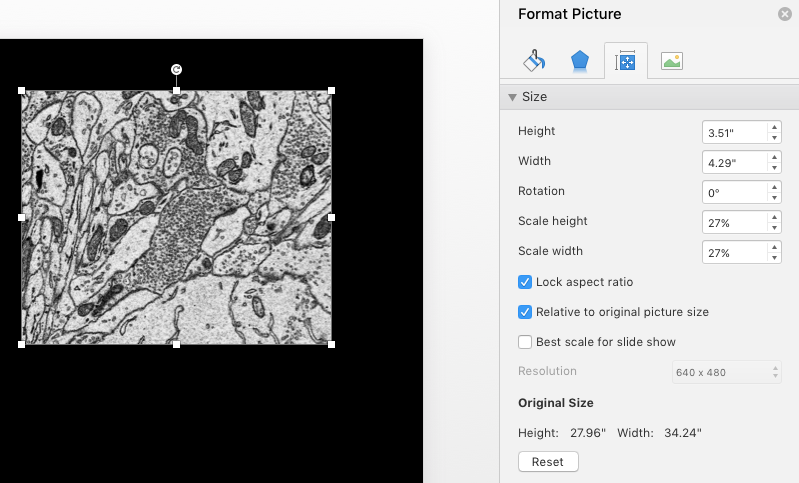
However, if I stretch the image you can see that the scale height and width are different – indicating the distortion.
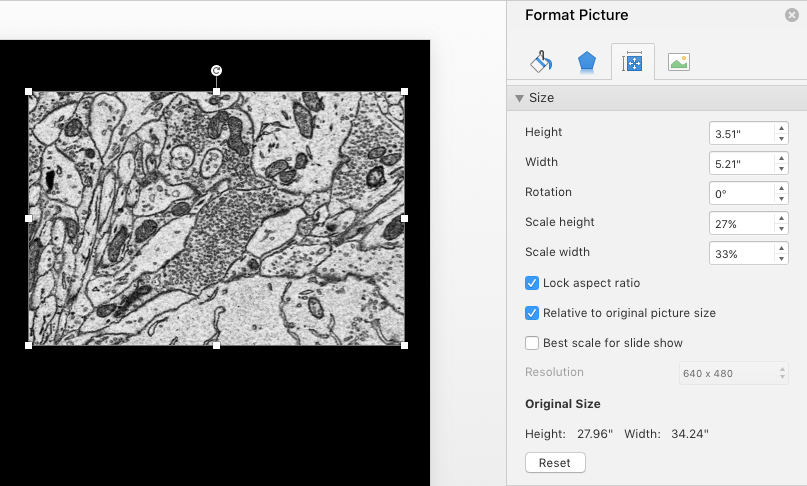
I can fix this just by entering in the same percentage in both the height and width scale columns.
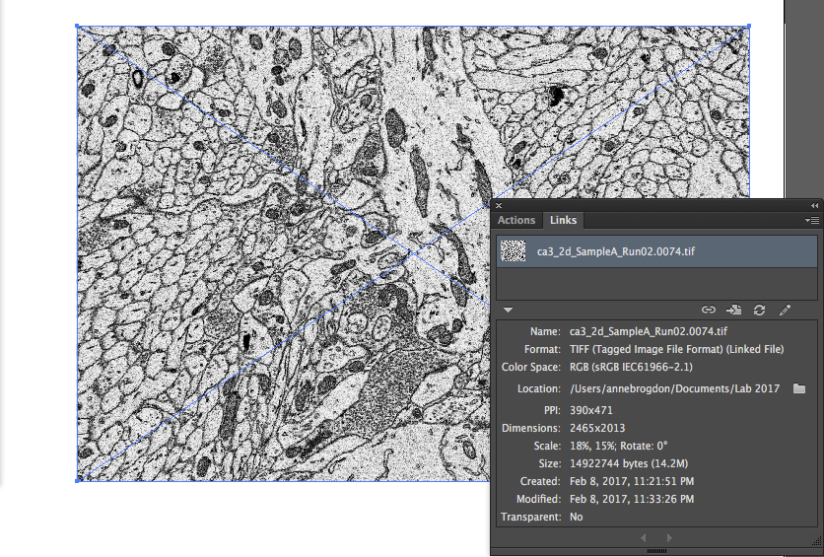
In Adobe Illustrator, this notation is a little harder to find. If you go up to “Window” -> “Links” it will open up a panel showing all of the images you have placed into Illustrator. If you select the image you want to check, you can see a long descriptive list of the attributes of the image displayed as below. Under “Scale”, you can see the height and width are the same indicating the image is not stretched.

If I stretch the image disproportionately, you can see that the Scale now displays two different percentages indicating the stretch. Also the PPI is now showing two different values.
How to fix it? Unfortunately, Illustrator doesn’t give you the easy option of just correcting the image to the right percentage. If you go to”Object” -> “Transform” -> “Scale” you can alter the horizontal and vertical percentages in a non-uniform way, but you need to mathematically figure out the difference. I’d strongly recommend just re-placing the image to be sure you have the image accurately represented.
Now you know how to check your type and images for distortions!
